- Create a Query
- Create a SQL View
- Grant Access to the View
- Provide Access to the SQL View for SmartList Builder
- Create a SmartList
- Add Fields from the SQL View to the SmartList
- Make Changes to SmartList Builder
- Validate SmartList
- Grant Access to SmartList
Here's a detailed overview with images...
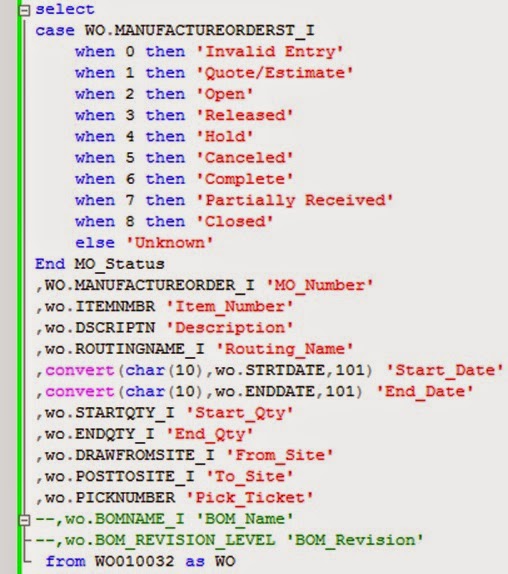
Create a SQL Query as a source for a View - this query should provide English language column names, text based statuses and use optimal field formats. Adding the table directly can create a view with column headers and data that don't make a lot of sense to a user.
Here is an example query, intended to provide Work Order Status information in SmartList format:
Use the SQL Query to create a SQL View - you will need to run this against any company database you wish to access this SmartList from.

Grant Select Access for DYNGRP on SQL View
grant select on Lik_MO_Status to DYNGRPGrant Permission in SmartList Builder Security for the SQL View. From Great Plains navigate to Microsoft Dynamics GP > SmartList Builder > Security > SQL Table Security

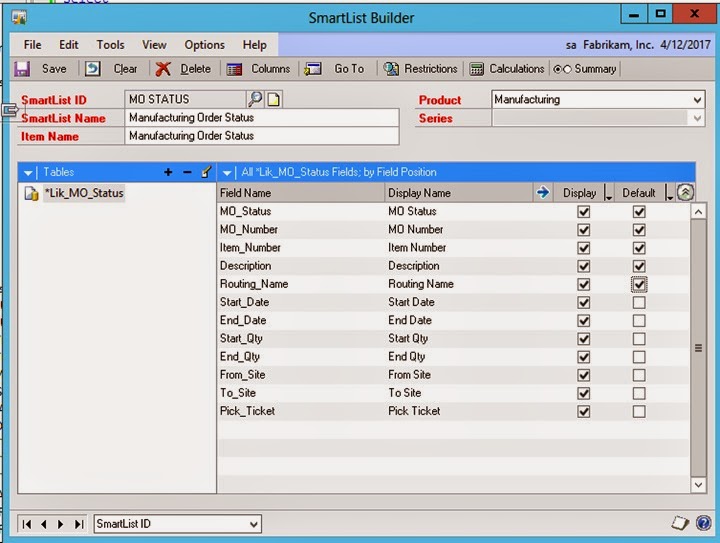
Create a New SmartList. In Great Plains navigate to Microsoft Dynamics GP > Tools > SmartList Builder > SmartList Builder and add the SQL View and its Columns by clicking the Plus Sign as highlighted in the image:

Choose the columns to enable for the SmartList and the default columns.

You can use the display options and defaults in this screen to change the display format. This is especially useful for changing the default currency format to numeric on quantity fields.
When you next open SmartList, you will receive the following dialogue. Click Yes to enable the newly created SmartList.

Validate the SmartList existence and configuration by browsing to the SmartList.

Now that you've added your SmartList, refer to this blog post on how to grant Security for the users who require access:
SmartList Security Setup
No comments:
Post a Comment